Configure DHCP for an Epson TM-U220
Overview
This article describes how to configure the DHCP settings on a POS device for Epson TM-U220 printers. The DHCP control enables an iOS device to automatically assign an IP address to an Epson TM-U220 printer.
Print a Network Status Sheet
Once the printer is connected to your router, follow the instructions below to print a status sheet displaying the printer's network settings. This is also a useful action to understand if you ever need to verify your printer's network settings in the future.
Ensure the printer is turned on.
2. Turn the printer around and with a pen or pencil tip, push the pinhole reset button on the back of the printer for four seconds. 3. A status sheet should auto-print with the printer's IP address on your network.
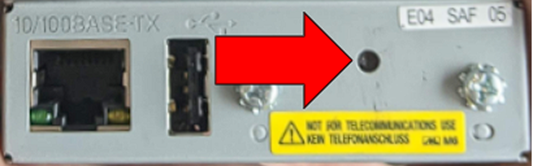
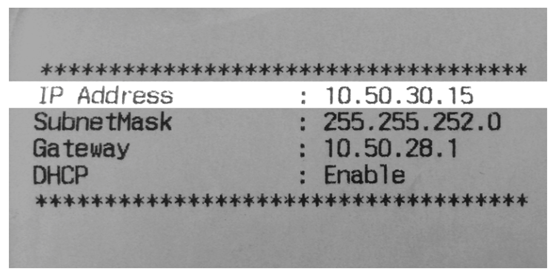
If the network status sheet from the previous step prints an IP address of 192.168.192.168, then the printer is an older model known as static and not yet connected to your network. 192.168.192.168 is the default Epson IP address required to configure the printer's network settings. You will need to manually connect your printer to your network through DHCP configuration.
In order to connect your printer to your internet network, you will need to temporarily change the IP address on our iOS device to the printer's default IP. Then, you will enable DHCP configuration in order to assign the printer an IP address on your network.
Temporarily Connect iOS Device to Printer's IP Address
- On the iOS device that you will be printing from, navigate to Settings > Wi-Fi.
- Tap the information icon beside the connected network to open the network settings.
Tap Configure IP, then select Manual.
4. Change the IP address to 192.168.192.100, and change the Subnet Mask and Router according to the network configuration ticket that was printed above.
5. Tap Save at the top right corner.
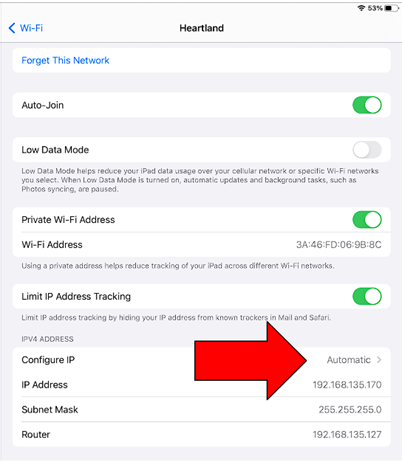
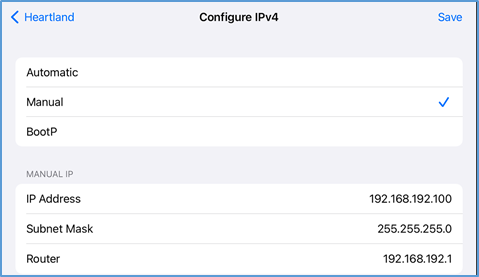
Your iOS device is now configured to communicate with your printer. This is required so that you can configure your printer's IP address from the iOS device.
Enable DHCP Configuration
Now that your printer and iOS device share the same IP address, you can carry out DHCP configuration. This is required so that you can give the printer a dynamic IP address from your network.
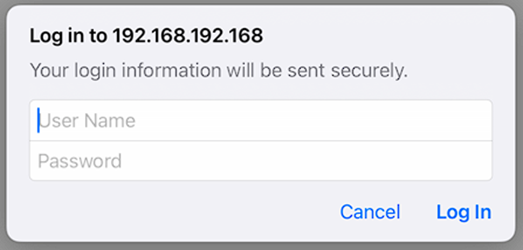
- From the iOS device, open a new browser window and tap 192.168.192.168 into the address field. An Epson web configuration login window will appear.
- In the Username box, enter “epson”.
In the Password box, enter “epson”. If the password is not “epson”, it will be the device serial number in all CAPS.
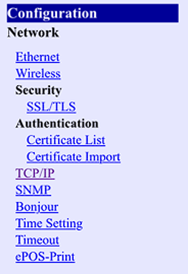
4. From the left-hand menu, under Configuration, navigate to the TCP/IP settings category to configure IP settings.
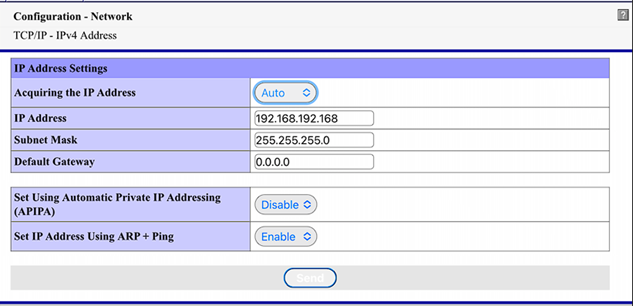
5. Change the Aquire the IP Address setting to Auto. This will populate the IP address field with a dynamic address assigned to your printer.
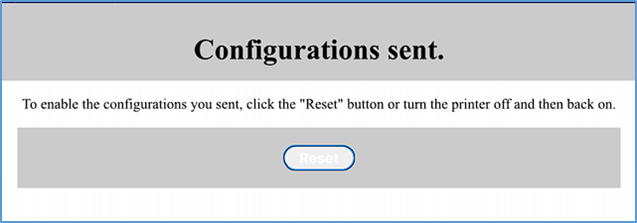
6. Click Send to save the changes to the printer. You should see a confirmation that the configuration was sent.
7. Power the printer OFF and then back ON.
Confirm Printer's DHCP Configuration
Turn the printer around and (using a pen or pencil tip) push the pinhole reset button on the back of the printer and hold for four seconds.
A status sheet should auto-print with an IP address determined from the DHCP configuration. If the network settings match the settings on the TCP/IP page, the printer is connected to your internet network and ready to be paired with Genius.
Return the iOS Device to the Network
- On the iOS device, navigate back to Settings > Wi-Fi.
- Tap the information icon beside the connected network to open the network settings.
- Tap Configure IP and select Auto.