Set up an Epson TM-U220
Overview
This article describes how to set up the Epson TM-u220 printer for Genius.
For procedures describing how to configure the DHCP settings on a POS device for Epson TM-U220 printers, review our article DHCP Configuration Guide for Epson TM-U220 Printers. The DHCP control enables an iOS device to automatically assign an IP address to an Epson TM-U220 printer.
Connect your kitchen printer to Wi-Fi
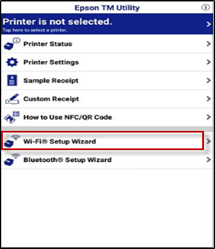
- Run the Epson TM Utility.
Select Wi-Fi Setup Wizard from the menu.
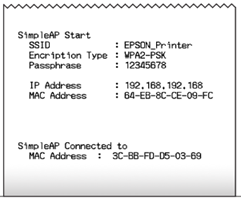
3. Select the model of the printer you want to connect to from the list then press Next. Tip: The U220 will be at the bottom of the list. 4. Follow the steps on the Status Check page. 5. The printer will print a SimpleAP Status Page check. This status message shows the current SSID, the Encryption type, passphrase, current IP and MAC address of the printer. These are the values currently set on the device before TM net sets them for your network.
6. TM Net will turn on Wi-Fi on your device if not currently connected. 7. TM Net will prompt you to enter your Wireless Network name (SSID). 8. TM Net will prompt you to select your wireless security type. 9. TM Net will prompt you to enter the password for your Wireless Network. 10. Specify Auto for having the router automatically assign the IP address or Manual to manually enter an IP address for the printer. Tip: Most users will want Auto. 11. TM Net will ask if you want to send the new settings to the printer. Check the settings and send. 12. The printer is now selected and ready with the new settings. 13. Check the printer settings, confirming the IP address of the printer.
Connect your kitchen printer via Ethernet
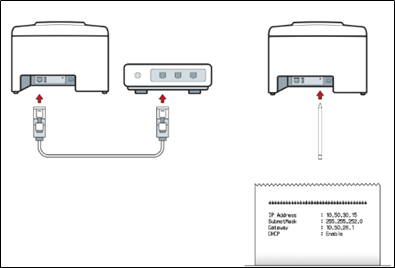
- Turn off the printer by pressing the power button.
- Connect one end of the Ethernet cable to an Ethernet port on your internet router.
- Connect the other end of the Ethernet cable to an Ethernet port on your internet router.
- Turn the printer on.
- Turn the printer around and with a pen or pencil tip, push the pinhole reset button on the back of the printer for 4 seconds.
A status sheet should auto-print with the printer’s IP address on your network.
Assigning your printers
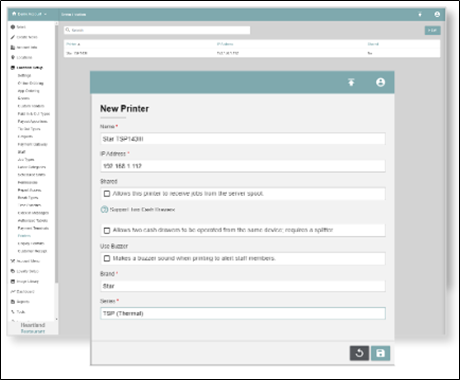
- In the Main Menu, click
then click Printers.
- In the Printers screen, click the New button to add a printer.
- In the Name box, type a descriptive name for the device (e.g. Coffee Bar printer).
- In the AP Address box, type the IP address of the printer.
- Select the Printer Brand.
- Select the Printer Series.
Click the Save icon to save the record.
8. Click the upload icon to publish changes. 9. Click Yes at the prompt.