Configure a Toshiba HSP100 or HSP150 printer
Overview
This article describes how to configure a Genius site to use Toshiba HSP100 and HSP150 Thermal Printers.
Prerequisites
You must update the firmware version of your Toshiba HSP100/150 to .21 before it can be used with Genius version 6.60. The following information provides the tools and steps needed to update the firmware of the Toshiba printer and configure it within the Genius Admin Portal.
Toshiba Utility
https://business.toshiba.com/product/hsp100
https://business.toshiba.com/product/hsp150
Self Tests
You can do a self-test page to print current settings;
- With the printer on, open the cover and press the feed button until it beeps (one time).
- Close the cover and the print will be the current setting.
- Press the feed button (long press) to return to online mode.
Default Password to Access Printer via Web or Toshiba Printer Utility
Username: admin
Password: admin
Installing the .21 Toshiba Firmware
The steps in this section will guide you through installing and uploading the new firmware. The new firmware is based on the printer utility.
- Download a copy of the updated Toshiba firmware (version 00.21): https://business.toshiba.com/product/hsp100
Run the printer utility and select the Flash utility.
3. Select F/W Download.
4. Select the appropriate files for each printer, then drag the firmware files to the FW File Information list. (HSP100=Amy=TRST-P2X, HSP150=Clara=TRST-P1X).
5. Select the printer via USB or Ethernet. 6. Press Download to update the firmware.
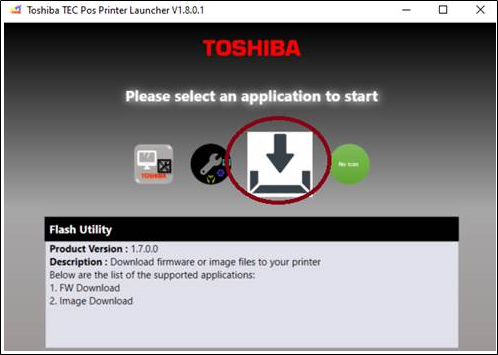
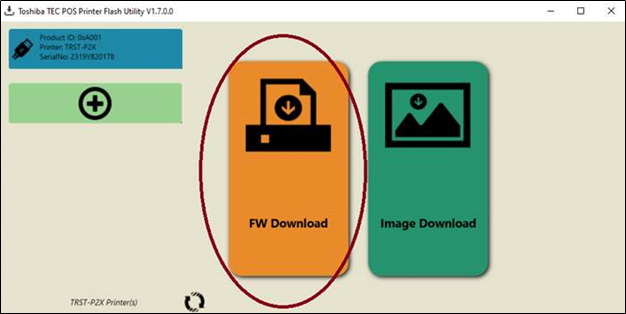
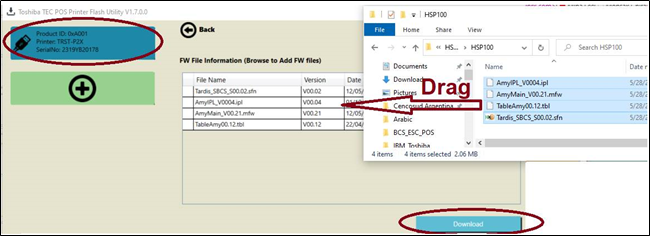
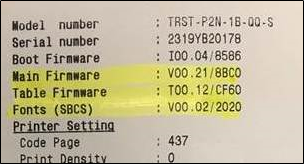
Tip: You can do a self-diagnostic page to confirm the printer has the correct firmware.
Example Old firmware:
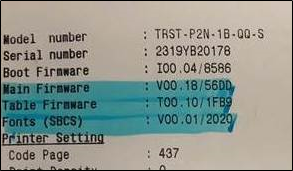
Example New firmware:
Genius Admin Portal Setup
- In the Admin Console's Main Menu, click Location Setup, then click Printers.
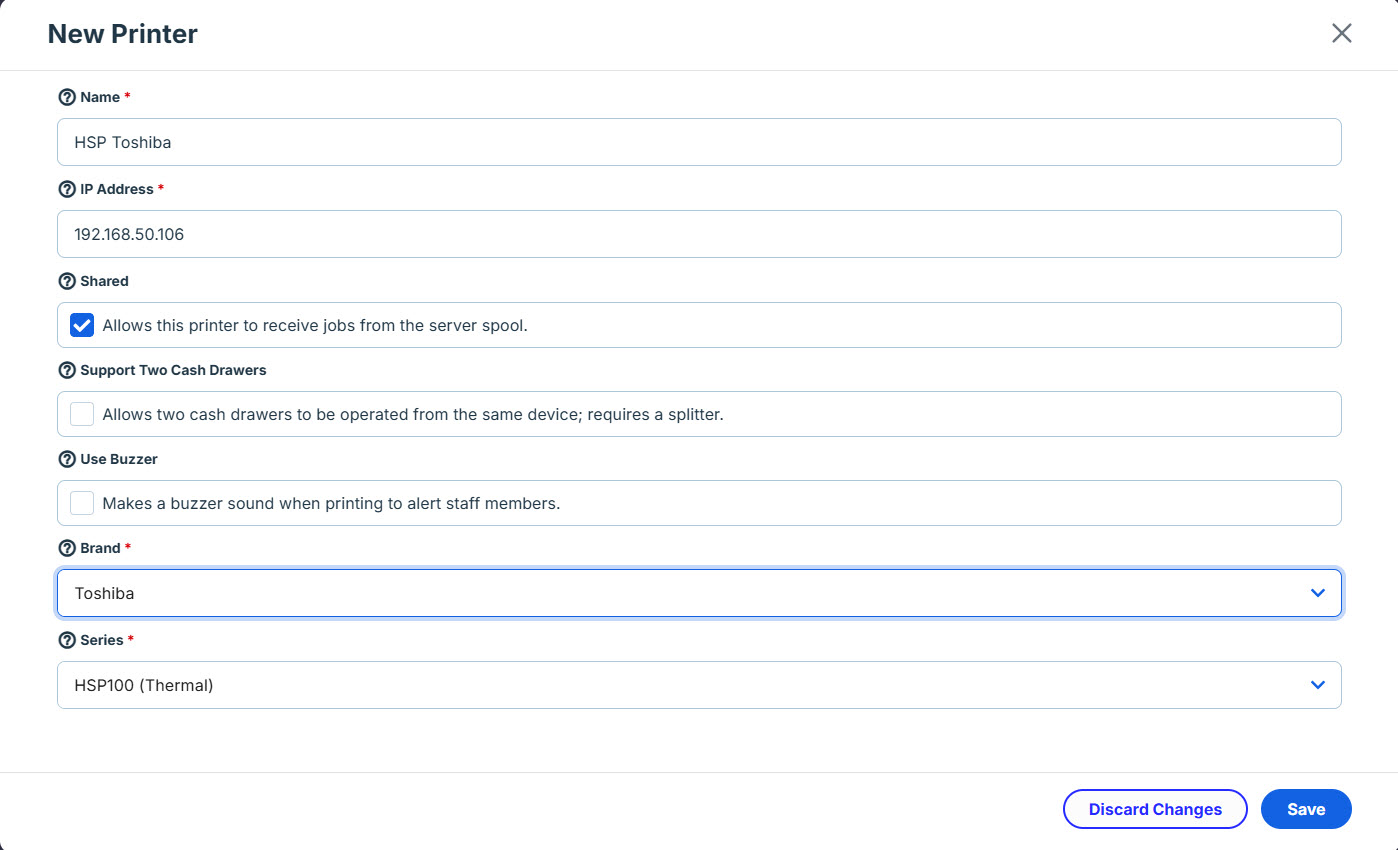
- In the Printer's screen, click New.
- In the Name box, enter a descriptive name for the printer.
- In the IP Address box, enter the printer's IP address.
- In the Brand list, select Toshiba.
In the Series list, select either HSP100 (Thermal) or HSP150 (Thermal).
7. Click Save, then click Publish.
After receiving the published update, you can select and configure the device within the iPad app as you would with any other printer setup.