How to Connect TSP143IIIW Star Receipt Printer to Wi-Fi
Connect Manually
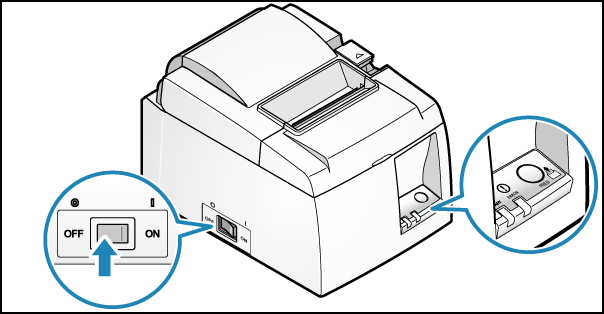
First, make sure the printer is off. Then perform a self-print to get the MAC address of the printer.
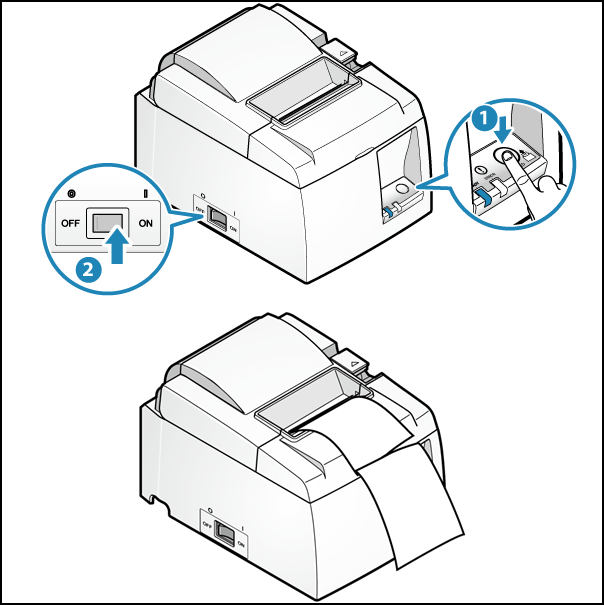
To perform a Self-Print, press and hold the FEED button (1). Do not let go, but then turn the power on (2). Take your finger off the FEED button when self-printing has begun.
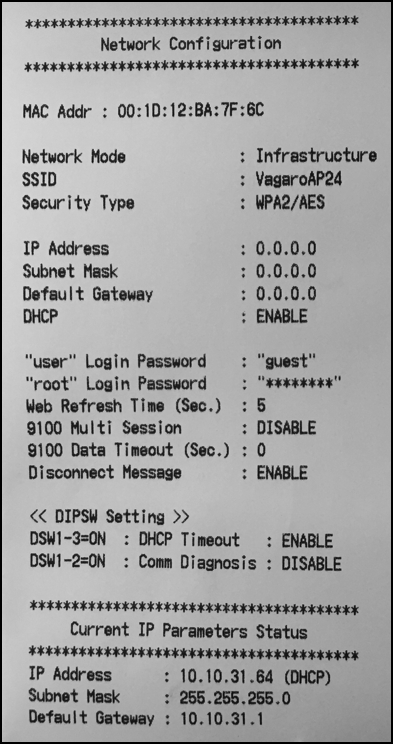
On this printout, you can check the MAC address from Network Configuration.
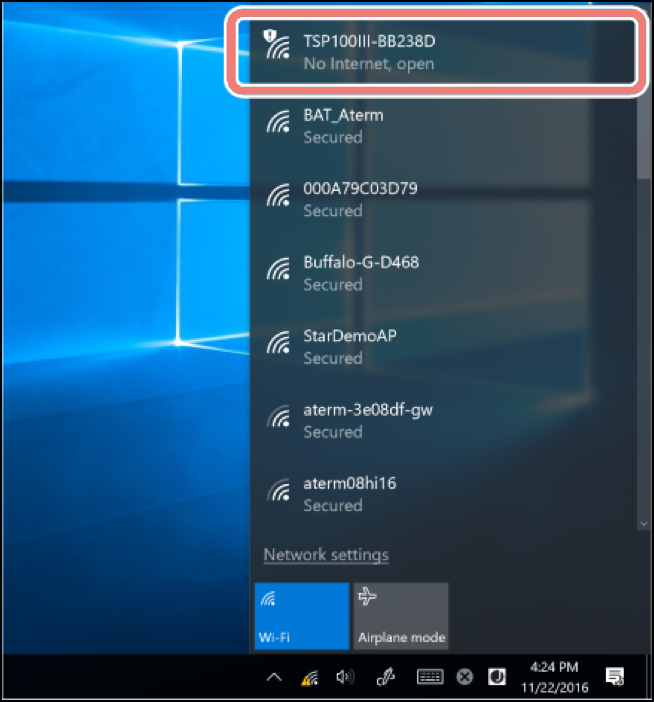
Click the network icon in the taskbar, and from the connectable devices list, refer to the last 6 digits of the MAC address. Select the matching devices, then click Connect.
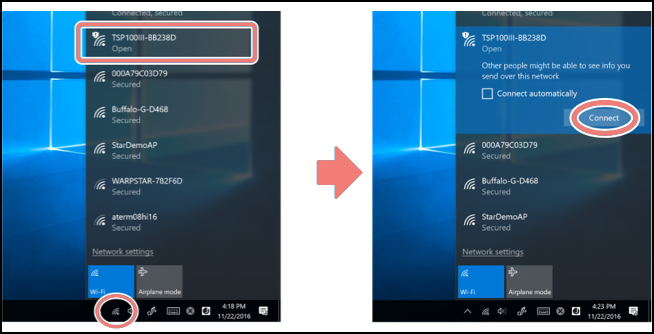
No Internet, open will display under the selected device, and the connection will be established.
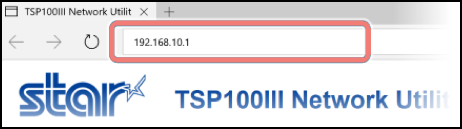
Next, log into the Web Configuration. Open a web browser and enter the IP address that appears under Current IP Parameters Status from your test print in the address field. In this example, the IP address is 192.168.10.1.
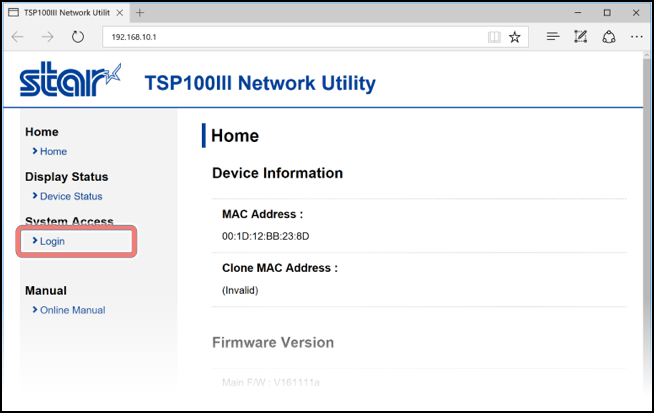
Click Login.
Note
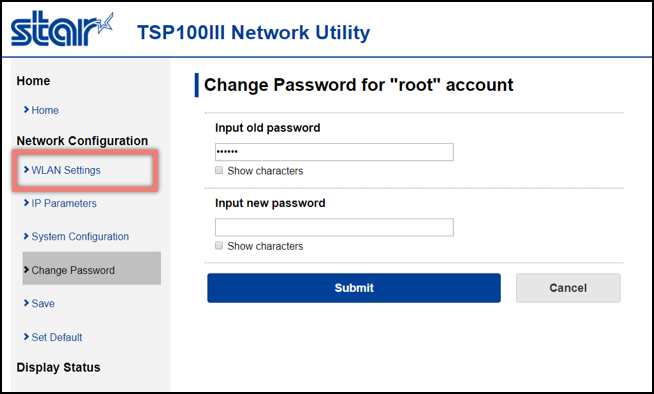
If you don't already have a login, the default login name and password are as follows:
Login name: root / Password: public.
You will be prompted to change your password after logging in. DO NOT CHANGE YOUR PASSWORD. After login, click WLAN Settings.
Select Infrastructure Mode, enter your internet's SSID and Security Key and click Submit to connect the printer to your network. Make sure to set Security to WPA2/TKIP.
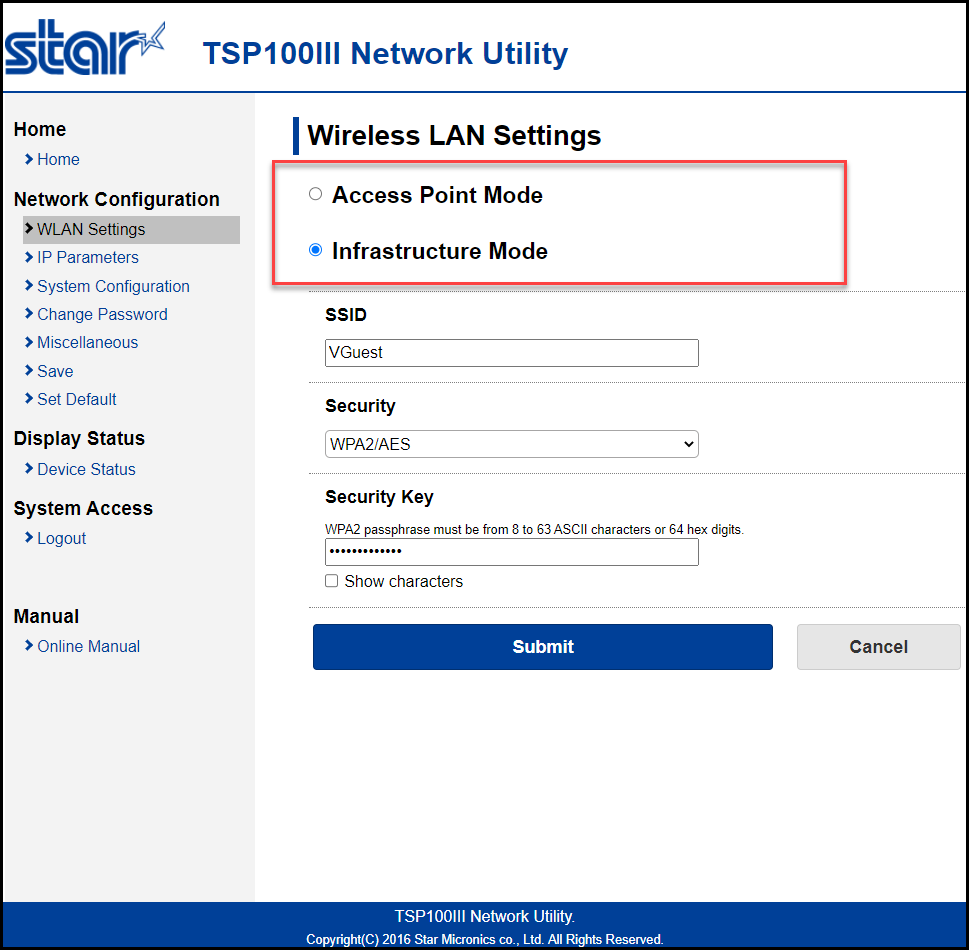
Click Submit.
Click Save.

Click Execute.
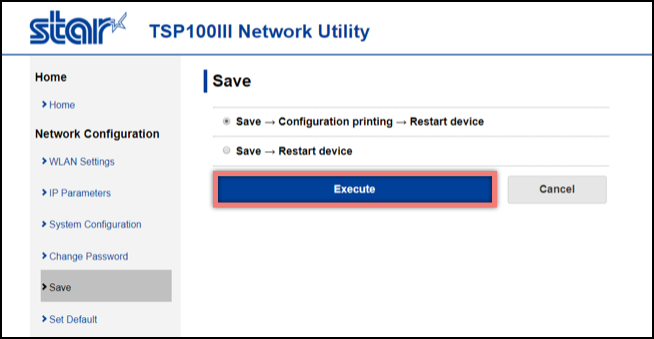
Your printer will restart and will stay connected to your network.
If this is successful, follow the steps below.
Related Articles
How to Put a Star SP700 Printer into Epson Mode for use with QSR Automation
Setting Up the Printer Turn off the power to the printer and unplug it. Flip it upside down. Unscrew the panel on the bottom. (This will require a Phillips head screwdriver.) Note: The dip switch panel is smaller than it might appear in these ...Remotely setting static IP on Star Printer
Remotely setting static IP on Star Printer All steps must be completed from a phone or iPad on the same network as the printer. Thermal Printer Printing current network configuration Turn off the printer at the switch Hold down the feed button, then ...Epson TM-L90 Label Printer: User manual
See the attached PDF User Manual.How to: Configure an Epson TM-U220 Impact Printer
How to: Configure an Epson TM-U220 Impact Printer Overview In this article we will review how to change the network configuration of an Epson TM-U220 impact printer. It may seem a little daunting at first, but the whole process can usually be ...How to: Factory Reset the Epson TM-U220 printer
Reset the printer to factory defaults to wipe any existing configurations. Turn the printer OFF Turn the printer upside down Locate the Network Adapters on the rear underside of the printer. The small black dot below or above the yellow label is ...