Share internet from a Mac or PC to your router
WARNING
Call our POS Support Team before attempting this.
Enabling Internet Sharing on your computer increases your security risk. We do not recommend enabling this unless you are in a trusted network. Sharing internet across devices can impact performance and reliability of connection.

This article is provided as a guide and outside of POS Specialists Support scope, we are unable to assist with troubleshooting should there be any issues getting the feature to work correctly.

Objective
This will show how to Share Internet from a Mac/Windows to Your Phone
Procedure
MAC
1. Connect the Ethernet cable to the Mac
2. Launch System Preferences from the Apple menu and click on Sharing
3. Click on Internet Sharing from the left menu
4. Select the pull-down menu next to Share your connection from: and choose Ethernet
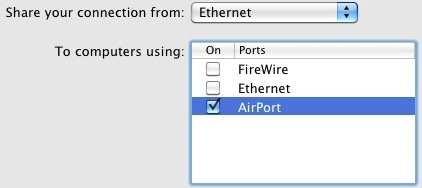
5. Alongside To computers using: check the box next to Ethernet
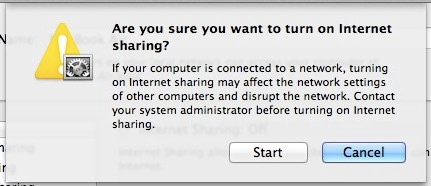
You’re done. Your Mac is now sharing its wireless internet connection to a device connected to the Ethernet port.
Windows
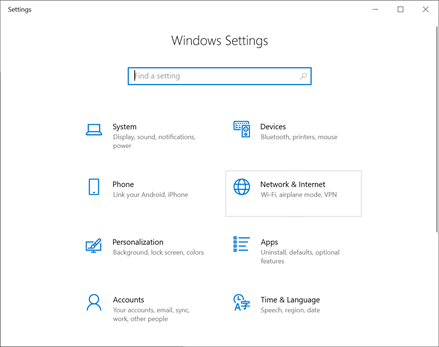
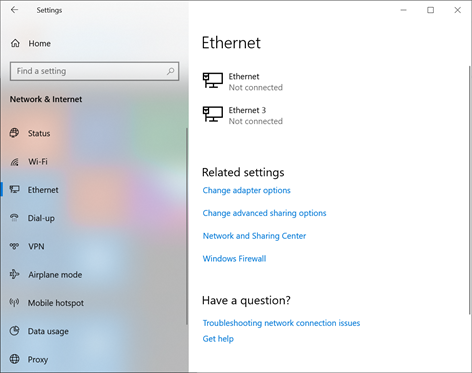
- Select the Start button, then select Settings
- Network & Internet
- Ethernet
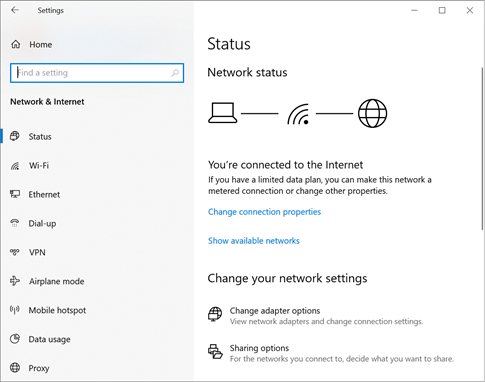
- Change Adapter options
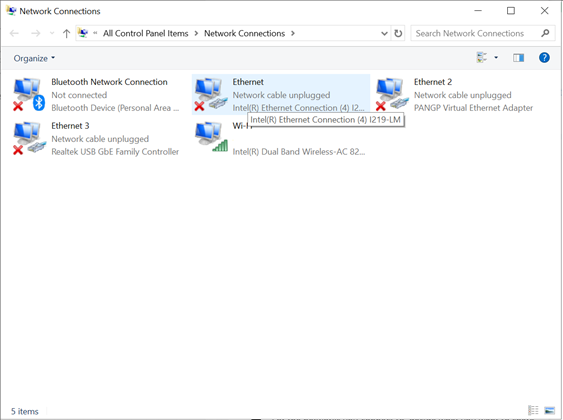
- Select the Ethernet connection that you are using to connect to the phone you want to share internet with
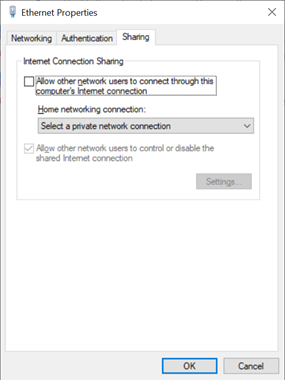
- Select the Sharing tab and select allow other users to connect through this computers internet connection
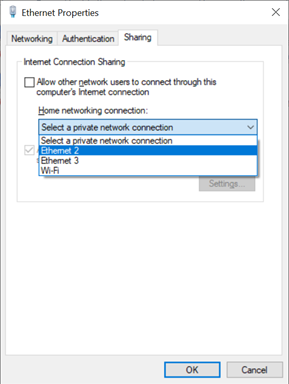
- From the Home networking connection: drop-down select the interface needed and press OK
You’re done. Your Windows Machine is now sharing its wireless internet connection to a device connected to the Ethernet port.